If you’re in need of an organized desk space, these five steps will help get you there. It’s time to stop drowning in unnecessary papers and other random items and create a space that works for you and not against you. Let’s do this.
Every morning I have the same routine: coffee, sit down at my desk to sip said coffee and work for 30 minutes, make lunches, take a shower and start my work day. Since my desk space is the second thing I see in the morning, it’s important to keep it as organized as possible.
Here are some tips, tricks, and product recommendations for an organized desk space.
5 Steps to an Organized Desk Space
Step One: Start with a clean slate
Getting your desk space organized will be easier when you’re starting with a clean slate. Clear everything from the desk surface and from the drawers. Set everything on the floor or table.
If your desk is very cluttered, most likely the surface hasn’t been cleaned in quite some time. Clean your desk inside and out with a multi-surface cleaner. This will start you off on the right foot!
Step Two: Go through everything to toss, keep or relocate
Now that everything is off the desk and out of the drawers, it’s time to sort through it all. Separate the items into three piles: throw away, keep and relocate.
Throw away:
- Items that are broken need to be thrown away. Holding onto them is just adding to the clutter.
- Papers you no longer need can be placed in recycling
- Dispose of any trash
Relocate:
- Any items that either belong in another room or belong at home, need to be removed
- If you borrowed something from a colleague and never returned it…better late than never
- If you have 50 pens, 1,000 paperclips and post-it notes out the wazoo, you can take those to the office supply room or box them up and store the extras somewhere else
Keep:
- Don’t go overboard on knick-knacks and personal items; a desk full of ‘stuff’ can be very distracting
- This is a good time to go through your desk supplies and see which pens are working and which items need to be replaced
- Keep the items that help you get your job done and that you know for a fact you use on a daily basis
Be thorough, be stern and even enlist help from a friend, family member or colleague if you need to.
Step three: Be mindful of your desk layout
It does matter how and where things on your desk are placed. You will want to position everything in a way that maximizes productivity.
- The center of your desk is reserved for the computer (obviously)
- Items you use every day should be kept at arm’s length and on your dominant side
- Keep pens and pencils in a cup so they’re easy to find
- Keep things like paper clips, staplers where you tend to work on paperwork
- Keep some ‘white space’ for papers to sign or a notebook to jot down notes on whatever side you write with
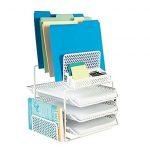
- Keep papers you refer back to on a weekly basis in file folders stored in an upright organizer
- Use a letter tray for incoming and outgoing paperwork
By keeping your most used items within arm’s length and where you can easily find them, you’ll save up to an hour a day looking for things and moving things around on your desk.
Step four: Store items not used daily out of the way
Since you’re saving the top of your desk for important, daily items; use the drawers for items that are still needed but not as frequently. As you’re going throughout your work day, make a mental (or written down) note of what items are used the most and what items are not.
Think of your drawers in an order of importance. Most used items go in the first drawer and so on.
Some examples of items you might store in the drawers are:
- Extra office supplies
- Chargers
- Extra set of earbuds
- Snacks or mints
- Travel-sized toiletries such as deodorant, lint roller, nail file, toothbrush, and toothpaste
- Calculator
- Labelmaker (my favorite one)

Other items, like extra office supplies, I store in decorative storage boxes like these on a bookshelf by my desk. I like that you can label them so you immediately know what’s inside. I also have two magazine holders since I frequently reach for a magazine when I need some inspiration. The book shelf is on my right side (my dominant side) and it’s easy to grab what I need without having to get up and disturb my workflow.
Step five: Schedule Daily Maintenace
Now that you have an organized desk space, in order to keep it that way you have to be diligent at putting things back after you’ve used them. Spend a few minutes at the end of your work day cleaning up your desk. Put items away, wipe down your computer and desktop, throw away any trash, shred papers or unwanted junk mail (I have this shredder and it’s a perfect size, plus incredibly powerful) and get your desk ready for a new day. Walking into your office every morning to a clean desk will do wonders for your attitude and mental clarity.
Do you have any organizing tips for keeping your desktop organized? What are some of your favorite products and go-to items?
The post 5 Steps to an Organized Desk Space appeared first on Mom Fabulous.


No comments:
Post a Comment